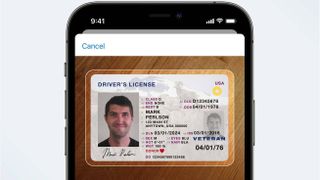
As more states accept digital documents at TSA checkpoints, you may be wondering, "How do I add my ID to Apple Wallet?" Well, the first question you must ask is whether your region supports Apple Wallet IDs. As of this writing, only Maryland and Arizona acknowledge Apple Wallet IDs.
Once you've confirmed that your state accepts Wallet IDs, you can add your driver's license or state ID, but keep in mind that Apple Wallet requires verification from your state's motor vehicle administration. As such, before attempting to clear an airport security checkpoint, allow sufficient time for your ID to be "green lit."
How to add your driver's license or state ID to Apple Wallet
Before diving into these guidelines, make sure that your iPhone is updated to the latest version of iOS. Courtesy of the Maryland Department of Transportation, here are the step-by-step instructions on how to add your ID to Apple Wallet:
1. Open the Wallet app.
2. Tap on the plus (+) button.

3. Look for the "Driver's License or State ID" option and select your state. If you don't see your state, this means it's not a participant of the Apple Wallet ID program. If you do see your state (e.g., Maryland or Arizona), tap on it.

4. Choose whether you'd like to add your ID to your iPhone only or iPhone and Apple Watch.

5. Scan the front of your ID. Make sure it's placed on top of a simple dark background in a well-lit room.

6. Scan the back of the ID under the same conditions.
7. Tap "Continue."
8. You'll land on a page that says, "Additional Verification." Tap "Continue" again.

9. Follow the on-screen instructions to take a photo (for fraud-prevention purposes).
10. Next, tap on "Continue with Face ID," which sends your selfie and ID info to your state's issuing authority.

11. Tap "Done."
Once you're verified, you'll receive an Apple Wallet notification telling you that your digital document is good to go for select airport security checkpoints. Be sure to check out our in-depth guide on what it's like to clear TSA with an Apple Wallet ID.
